At last, the starboard float is complete and we are ready to work on the port float. Actually, there are several more tasks for this float, but these tasks will have to wait until the beams are complete and we are ready for final assembly. Specifically, we have the following short list to do later in the project:
- Install beams,
- Install chainplate,
- Drill vent holes in bulkheads to equalize pressure after beams are installed,
- Prepare holes for hardware installation,
- Paint.
Nonetheless, we are done for now. Here is a nice shot of the completed float with the float-in-waiting in the background. I'll have to bribe the neighbors to lend a hand in move the starboard float up to the storage rack. Two people can generally handle it, but a third is good for a margin of safety ... certainly don't want to drop the float after all that sanding.
Here is the view from the bow. Actually these photos aren't quite the finished product. I had to add some light glass tape along the edges forward and aft of each port opening. The original glass reinforcing wore too thin on these edges during the fairing, and the foam was exposed. So I laminated some 6-oz tape to the edges for a hard protective shell. This required a little sanding to blend. The result looks identical to these shots from a few days prior.
In retrospect, this process would have been more efficient if I had removed the strongback and worked on both floats together. There are several small jobs that only require a couple hours of effort but then need a day of cure time. If I could have worked on both floats, I could have performed these tasks on each float and let them cure together. In any case, hopefully I will be able to accelerate the overall process using the experience from the starboard float. I'll add posts about new techniques that I try on the port float.
Wednesday, July 6, 2011
Sunday, June 26, 2011
Fairing the port and hatch openings
This weekend I put in a few hours fairing and glassing the port openings. A heat wave has arrived just in time for summer. Temperatures in the 90s turned the boat house into an oven with indoor temps in the 110s. Needless to say I was not too keen on working during the midday heat, and the epoxy kicks within 20 minutes. So I tried to make progress in the morning and evening. Here is the process I followed for fairing the access port openings. First I built up a broad fillet with light putty between the edge of the port ring and the tangent of the hull. I also carved out about 1/8-1/4 inch of foam around the inside edge of the port ring and filled it with putty. This will make the edge more durable and prevent water from being absorbed into the foam core. Additional putty was used on the interior seam so the inside glass has a more uniform surface to bond to.
After the putty cured (a few hours in this heat) I sanded the fillet so it is tangent to the hull. A small palm sander works well for this type of work. The handheld belt sander, random orbit sander, and sanding blocks were all used, but the palm sander was the most used. I also sanded the inside edge of the ring and the interior seam.
After sanding, the access port ring was nicely blended into the hull. The broad fillets on the sides don't protrude too much so the overall figure of the hull is still fair. You might also notice that I softened the edges fore and aft of the opening, which again helps blend the ports into the hull form. The rotary grinder (aka Dremel) and palm sander made this a quick job. Of course, care is need to ensure a runaway rotary grinder doesn't wreak havoc on the fair hull.
Glassing the interior and exterior of the port openings is needed to structurally integrate the port rings with the hull. I only applied the exterior glass because it was relatively quick and easy, and the heat was making the epoxy kick too quickly. I slowed it down a little by setting the epoxy pan on an ice pack, which gave me about 40 minutes of working time. The glass patch is about 3 inches wider than the port ring on all sides. The ideal time to trim the glass around the opening is after curing for a few hours but before it fully cures. A sharp blade cuts it clean and quick.
Here is the opening after trimming. You can just barely see the outline of the glass patch. I also used peel-ply to help reducing the final fairing needed. I will need to do a little sanding to blend the edge of the patch, but it shouldn't be too painful.
Here is the view with the ports temporarily in place. I followed a similar procedure for the hatch. The result is a flat surface for the ports and hatch to seal against, while maintaining the sleek lines of the hull. I still need to glass the inside of the ports, but that should only take a few hours, and hopefully cooler temperatures will help.
After the putty cured (a few hours in this heat) I sanded the fillet so it is tangent to the hull. A small palm sander works well for this type of work. The handheld belt sander, random orbit sander, and sanding blocks were all used, but the palm sander was the most used. I also sanded the inside edge of the ring and the interior seam.
After sanding, the access port ring was nicely blended into the hull. The broad fillets on the sides don't protrude too much so the overall figure of the hull is still fair. You might also notice that I softened the edges fore and aft of the opening, which again helps blend the ports into the hull form. The rotary grinder (aka Dremel) and palm sander made this a quick job. Of course, care is need to ensure a runaway rotary grinder doesn't wreak havoc on the fair hull.
Glassing the interior and exterior of the port openings is needed to structurally integrate the port rings with the hull. I only applied the exterior glass because it was relatively quick and easy, and the heat was making the epoxy kick too quickly. I slowed it down a little by setting the epoxy pan on an ice pack, which gave me about 40 minutes of working time. The glass patch is about 3 inches wider than the port ring on all sides. The ideal time to trim the glass around the opening is after curing for a few hours but before it fully cures. A sharp blade cuts it clean and quick.
Here is the opening after trimming. You can just barely see the outline of the glass patch. I also used peel-ply to help reducing the final fairing needed. I will need to do a little sanding to blend the edge of the patch, but it shouldn't be too painful.
Here is the view with the ports temporarily in place. I followed a similar procedure for the hatch. The result is a flat surface for the ports and hatch to seal against, while maintaining the sleek lines of the hull. I still need to glass the inside of the ports, but that should only take a few hours, and hopefully cooler temperatures will help.
Monday, June 20, 2011
Solo hatch
After tiring of Ports getting all of the attention in the last post, Hatch left the 70's rock duo for a solo performance ... Okay, enough of that, back to the serious matter of installing the hatch in our F-82 trimaran. The process of cutting the opening was similar as that used for the ports. A router pattern was strapped to the hull and carefully aligned with the layout. The router depth was set to produce a reasonable shelf for the hatch support plate, while minimizing the difference between finished deck and hatch cover.
Here the hatch plate is epoxied in place and the inner opening cut out. Since the hatch opening is much larger than the ports, and I wanted to ensure it provided a flat surface for the hatch, I left the center intact until after the epoxy cured. The two large cutouts are for two port rings. The four smaller holes were precut with a hole saw to make clean corners. The plate was pre-glassed at the same time as the port rings ... many months ago. After glued in place, I simply cut along straight lines between the corner holes to finish the opening.
And here is the finish hatch opening. You may notice the gap between the central deck and the hatch plate. This opening will be filled in next (see below).
After cutting out the hatch opening, a test fit both ensured I didn't screw this up, and also gave me the opportunity to get a sense of progress. Once finished, this should be a nice installation.
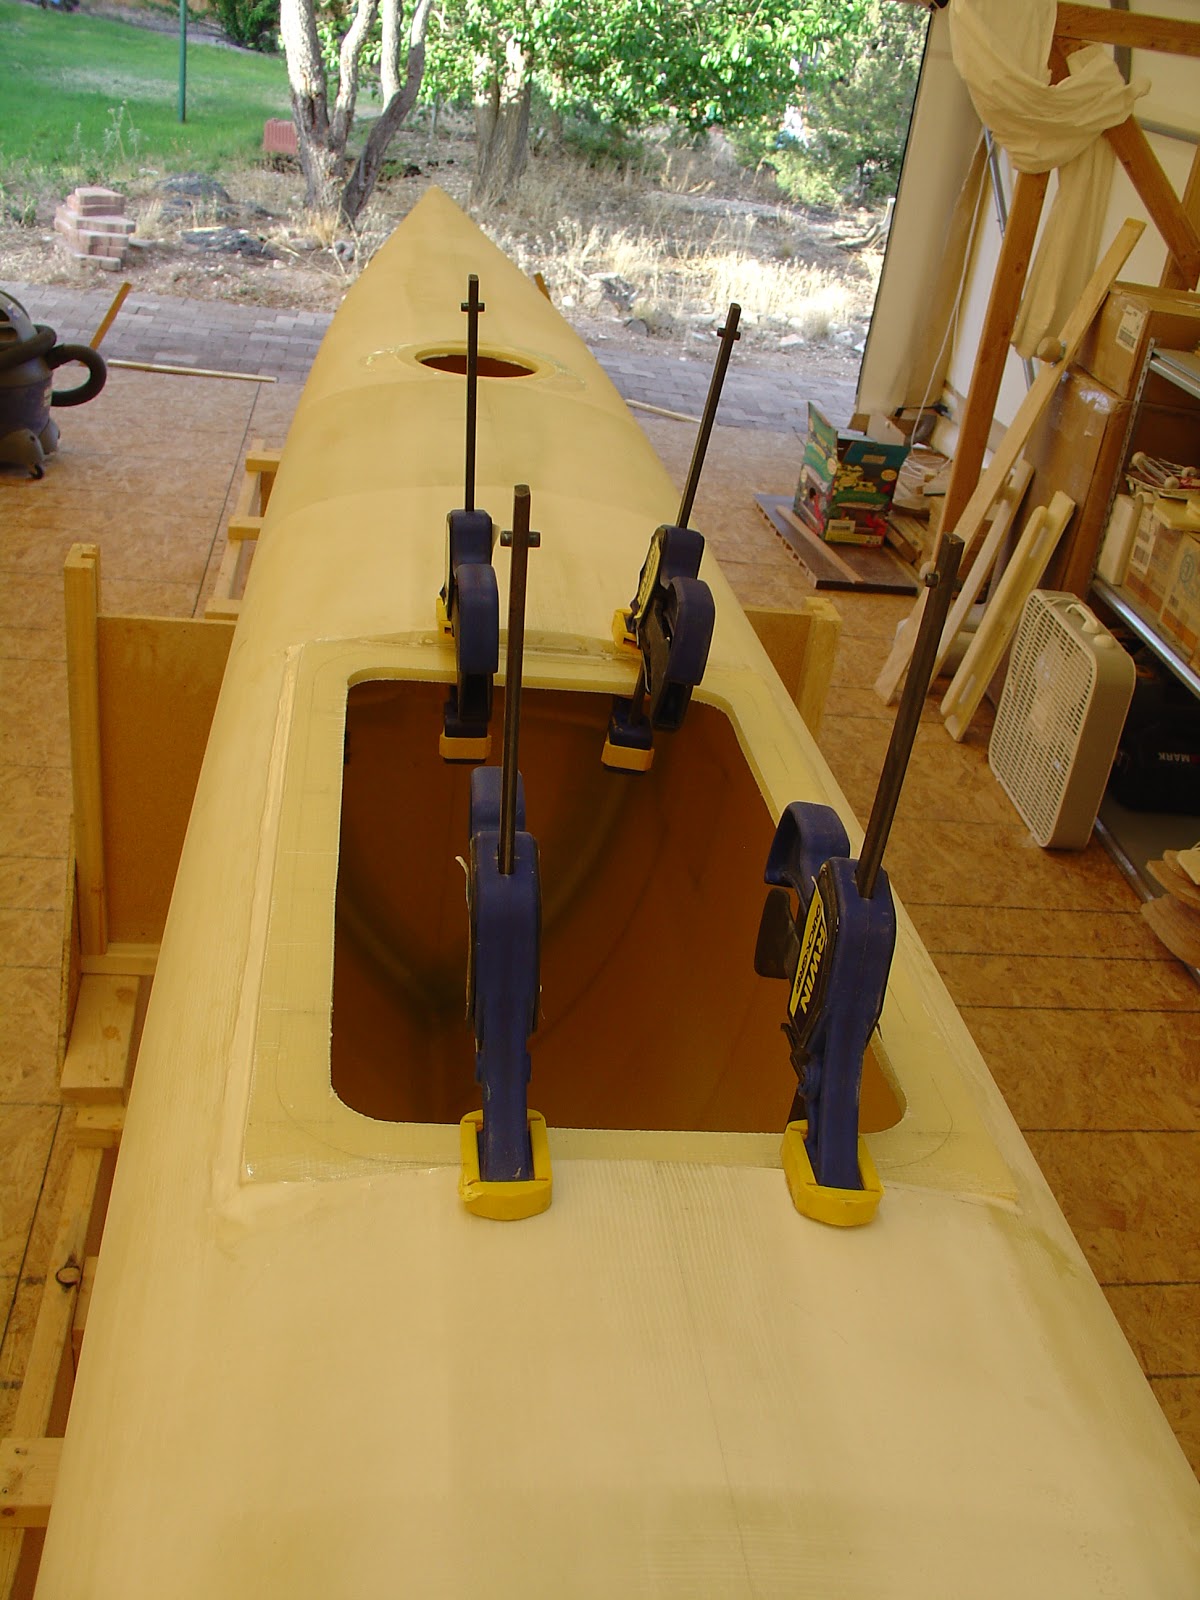
The last task was to fill the gap between the deck and the hatch plate. I made a template out of poster board and cut tight fitting slivers out of the leftover hatch plate center. I then glued these in place with a thin epoxy putty and held them in place with a couple clamps until cured. Next I will add some lightweight putty to blend the raised edge into the hull sides. After some cosmetic sanding and filing, I will glass the hatch opening for final structural integration. I expect a little follow-up filling and sanding to make it all smooth and fair.
Here the hatch plate is epoxied in place and the inner opening cut out. Since the hatch opening is much larger than the ports, and I wanted to ensure it provided a flat surface for the hatch, I left the center intact until after the epoxy cured. The two large cutouts are for two port rings. The four smaller holes were precut with a hole saw to make clean corners. The plate was pre-glassed at the same time as the port rings ... many months ago. After glued in place, I simply cut along straight lines between the corner holes to finish the opening.
And here is the finish hatch opening. You may notice the gap between the central deck and the hatch plate. This opening will be filled in next (see below).
After cutting out the hatch opening, a test fit both ensured I didn't screw this up, and also gave me the opportunity to get a sense of progress. Once finished, this should be a nice installation.
The last task was to fill the gap between the deck and the hatch plate. I made a template out of poster board and cut tight fitting slivers out of the leftover hatch plate center. I then glued these in place with a thin epoxy putty and held them in place with a couple clamps until cured. Next I will add some lightweight putty to blend the raised edge into the hull sides. After some cosmetic sanding and filing, I will glass the hatch opening for final structural integration. I expect a little follow-up filling and sanding to make it all smooth and fair.
Ports and Hatch
Ports and Hatch - Sounds like a 70's lite-rock pop duo! We made quite a lot of progress on the ports and hatch in the starboard float. In our last post we showed how we laid out the ports and hatch with our super high-tech laser system (while listening to the 70's super duo Ports and Hatch!) Here's how I fabricated the access ports in the deck:
I strapped the pattern for the router to the deck, carefully aligning it with our layout. By setting the depth of the router I was able to carve out a flat shelf to support the port ring. I wanted the top of the finished ports to be approximately flush with the deck, so it took a little arithmetic to determine how deep to set the ring. Although the router and this procedure is not required to make the ports, the result is very clean and I think it will look great.
Here is the resulting access port hole with the shelf cleaned up. The ring and port are also shown for reference. As described previously, the rings are intended to provide a flat surface for the port to mount on. I vacuum laminated the rings many months ago (when I thought this would only take a few weeks to finish!) Now the opening is ready for the ring to be glued in place.
A quick trial fit before final assembly. Even at this stage the port looks very clean and finished.
Here is the port hole with the ring glued in permanently with a thin epoxy - microballoon mixture. I also added some putty around the raised edge of the ring to start blending it into the hull. Next I will add more extra light putty to fully blend the raised edge into the hull. Where the deck rises above the ring will be filed back slightly to remove the sharp edge. Then I will add glass inside and out to structurally join the ring to the hull. A little filler and sanding and we are done with this step.
I strapped the pattern for the router to the deck, carefully aligning it with our layout. By setting the depth of the router I was able to carve out a flat shelf to support the port ring. I wanted the top of the finished ports to be approximately flush with the deck, so it took a little arithmetic to determine how deep to set the ring. Although the router and this procedure is not required to make the ports, the result is very clean and I think it will look great.
Here is the resulting access port hole with the shelf cleaned up. The ring and port are also shown for reference. As described previously, the rings are intended to provide a flat surface for the port to mount on. I vacuum laminated the rings many months ago (when I thought this would only take a few weeks to finish!) Now the opening is ready for the ring to be glued in place.
A quick trial fit before final assembly. Even at this stage the port looks very clean and finished.
Here is the port hole with the ring glued in permanently with a thin epoxy - microballoon mixture. I also added some putty around the raised edge of the ring to start blending it into the hull. Next I will add more extra light putty to fully blend the raised edge into the hull. Where the deck rises above the ring will be filed back slightly to remove the sharp edge. Then I will add glass inside and out to structurally join the ring to the hull. A little filler and sanding and we are done with this step.
Monday, June 13, 2011
Laser light show
Tonight I made a little more progress towards cutting the ports in the starboard hull. Not a lot of progress, but at least it wasn't more sanding. I used my laser plumb line to lay out the centerline along the deck and measured out the placement of the ports. A laser plumb line is certainly not a requirement to do this job, in fact it probably took longer to set up than pulling a chalk line a dozen times. But it is cleaner than a chalk line, and definitely more fun. This is a shot looking forward from the stern with the laser line on center. I transferred the line to the deck with a pencil and straight edge (it would have been much cooler to laser etch the line into the deck but this laser is a bit underpowered).
I also spent some time playing with my camera settings to get a more impressive laser shot. This was about the best I could do. Again, more fun than sanding! I suggest listening to Pink Floyd's "Dark Side of the Moon" while viewing this photo to fully experience this other-worldly laser light show!
And to help bring you back to reality after the sensory over-stimulation inflicted by the mesmerizing effects of the laser show, here is a photo of the pencil outline for one of the round access ports I'll cut out next. I know, barely visible penciled circles on a perfectly faired deck is a bit overwhelming, please try to contain your emotions ... Actually, I used the centerline to ensure all the ports would be neatly aligned. I remeasured their locations with some accuracy to keep them looking professional. Next I will use a pattern I cut out of plywood a few weeks ago to cut the openings with a router for a clean hole. I will then install the flat plates I made months ago for the ports to sit on. Again, this may be more effort than is necessary (this is my approach, not Ian Farrier's), but I think it will produce a very professional finish for ports that are less likely to leak.
I also spent some time playing with my camera settings to get a more impressive laser shot. This was about the best I could do. Again, more fun than sanding! I suggest listening to Pink Floyd's "Dark Side of the Moon" while viewing this photo to fully experience this other-worldly laser light show!
And to help bring you back to reality after the sensory over-stimulation inflicted by the mesmerizing effects of the laser show, here is a photo of the pencil outline for one of the round access ports I'll cut out next. I know, barely visible penciled circles on a perfectly faired deck is a bit overwhelming, please try to contain your emotions ... Actually, I used the centerline to ensure all the ports would be neatly aligned. I remeasured their locations with some accuracy to keep them looking professional. Next I will use a pattern I cut out of plywood a few weeks ago to cut the openings with a router for a clean hole. I will then install the flat plates I made months ago for the ports to sit on. Again, this may be more effort than is necessary (this is my approach, not Ian Farrier's), but I think it will produce a very professional finish for ports that are less likely to leak.
Sunday, June 12, 2011
Fairing complete
I know it has been awhile since the last new post. Progress has been slow while we have been distracted with the start of the sailing season and spring chores. I was hoping to show the finished ports in the deck, but I didn't quite get to it this weekend. The good news is I did finish fairing the starboard float. Here is a shot of me vacuuming up the remnants of the last fairing session. The most impressive thing about this is the temperature in the boat house was in the high 90's, after cooling from the mid-100s. Imagine dressing in a full tyvek suit, respirator, nitrile gloves, and work gloves and then going for a jog in Las Vegas in July, that's about what this was like. I guess summer is just about here! Luckily I only had to sand the deck, so it only took about an hour. Dawna also helped with the clean up duties which allowed me to get some cooling relief about a half hour quicker.
And here is the nicely faired hull all cleaned up. It is very nice and should produce a respectable finish once painted. During the week I'll try to start on the ports so we can put this float aside and move to the finishing work on the port float. Of course I also have to install the carbon fiber chain plates, but that will have to wait until I finalize some details about the rigging. And I will wait to cut out the holes for the beams until I am ready to install them. So still some work to do, but we are making progress.
Sunday, May 22, 2011
More sanding, more fairing putty ... sigh
Well, I think I can see the light at the end of the starboard float tunnel ... or is that a train!? I sanded down all of the fairing putty I applied the past couple weeks. This was a lot of effort, requiring about 5-6 hours of continuous sanding, but the result was very nice. The reinforcing layers of glass blend in with the hull seamlessly. And most of the putty has ben removed so the glass pattern is visible, though perfectly smooth. I was careful to only sand to the top of the glass so I wouldn't remove the structural glass fibers. The glass tends to be much more "slippery" under the fairing board, whereas the fairing putty produces significant friction and needs much more effort to push the board over. By noticing the difference in the feel, not to mention the appearance of the glass fabric pattern, I was able to gauge when an area was sanded enough.
Here is a close up view of the bow after sanding. The layers of glass are pretty clear, but if I close my eyes and run my hand over it (with a nitrile glove on so I don't get any skin oil on the epoxy) I can't tell where the layers transition. I did use the power belt sander a little on the second day of sanding to knock down the high spots in the skim coat. This made the hand sanding with the fairing board much more bearable. But be very careful with the power sander because it only takes a moment for it to cut through the fairing putty and into the glass, leaving a low area. Keep the sander moving at all times, and go over a large area uniformly for an even effect since the sander isn't big enough to blend areas greater than about 6 inches. I also stopped early enough to leave material for the fairing board to do it's job blending larger scale, irregular surface features.
After the sanding work, I carefully inspected the surface to find the few remaining low areas and discontinuities at the edges of the reinforcing layers. I then applied very thin layers of fairing putty with a wide squeegee. I tried to minimize the amount of putty applied so I won't have to do much more sanding. If you look closely at this photo you can see the shiny areas where the putty was applied. I'll do the same on both sides and then make the final pass with the long board. After that, we are on to hatch and port installation.
Here is a close up view of the bow after sanding. The layers of glass are pretty clear, but if I close my eyes and run my hand over it (with a nitrile glove on so I don't get any skin oil on the epoxy) I can't tell where the layers transition. I did use the power belt sander a little on the second day of sanding to knock down the high spots in the skim coat. This made the hand sanding with the fairing board much more bearable. But be very careful with the power sander because it only takes a moment for it to cut through the fairing putty and into the glass, leaving a low area. Keep the sander moving at all times, and go over a large area uniformly for an even effect since the sander isn't big enough to blend areas greater than about 6 inches. I also stopped early enough to leave material for the fairing board to do it's job blending larger scale, irregular surface features.
After the sanding work, I carefully inspected the surface to find the few remaining low areas and discontinuities at the edges of the reinforcing layers. I then applied very thin layers of fairing putty with a wide squeegee. I tried to minimize the amount of putty applied so I won't have to do much more sanding. If you look closely at this photo you can see the shiny areas where the putty was applied. I'll do the same on both sides and then make the final pass with the long board. After that, we are on to hatch and port installation.
Subscribe to:
Posts (Atom)